Buttery, Amazing Scones Recipe
Hey, I’m John Cannell, and today we’re making some buttery, amazing scones.
So let’s get started.
First off, set your oven to 400 Fahrenheit and line a baking sheet with parchment paper.
Why You’ll Love This
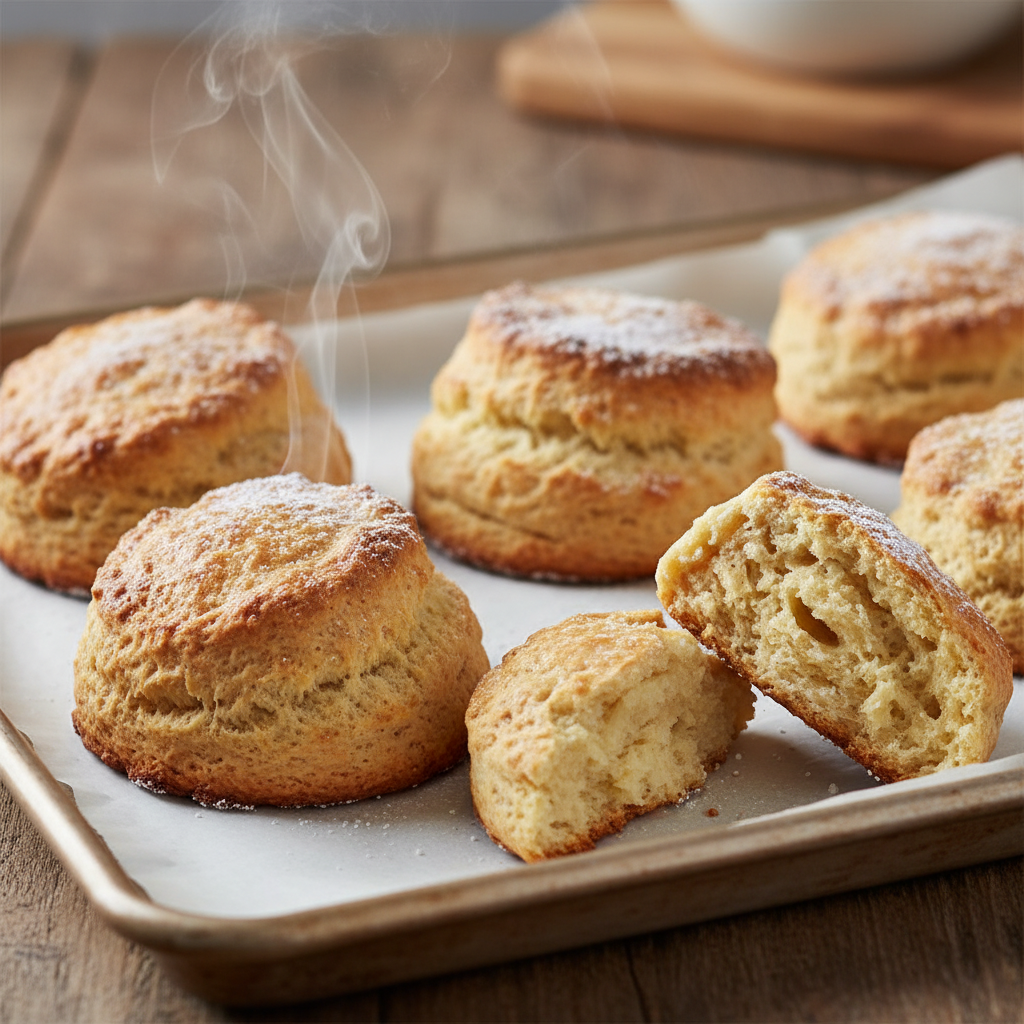
These scones are going to be so soft and fluffy and buttery, but golden and crisp on the outside.
They are not those disgusting, horrible, no good dry rock scones that you get at the like various places.
These are going to be delicious and they’re so easy.
This is an American style scone, which is similar in texture. It has a little bit less structure. It’s much easier to make and they’re shaped usually like triangles.
Think of this as like a blank canvas for deliciousness.
They whip up really quickly and you can add almost anything you like.
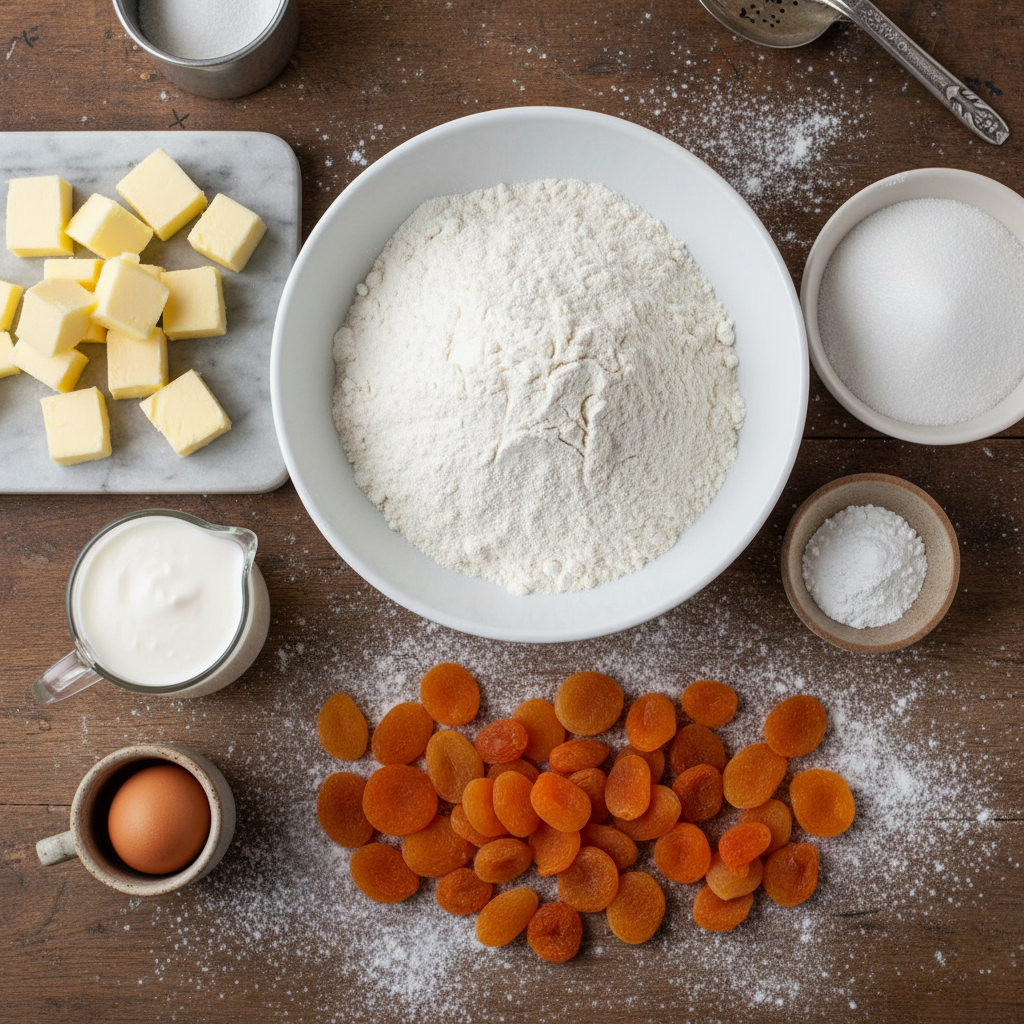
Ingredients
Dry Ingredients
- two and a half cups or 300 grams of all-purpose flour
- a quarter cup or 50 grams of granulated sugar
- two and a half teaspoons of baking powder
- half a teaspoon of sea salt
Wet Ingredients
- three quarters of a cup or 180 mils of heavy cream
- One large egg
- a tablespoon of a nice vanilla
Other Ingredients
- One third of a cup or 76 grams ice cold butter
Optional Mix-ins
- about half a cup, a little bit more of any mix
- some dried apricots
- toasted pecans
For Brushing and Topping
- a tablespoon of cream
- coarse sugar
Instructions

- Set your oven to 400 Fahrenheit and line a baking sheet with parchment paper.
- In a large bowl, add two and a half cups or 300 grams of all-purpose flour.
- Add a quarter cup or 50 grams of granulated sugar.
- Add two and a half teaspoons of baking powder.
- Add half a teaspoon of sea salt.
- Grab a whisk.
- Whisk this until everything is nicely distributed.
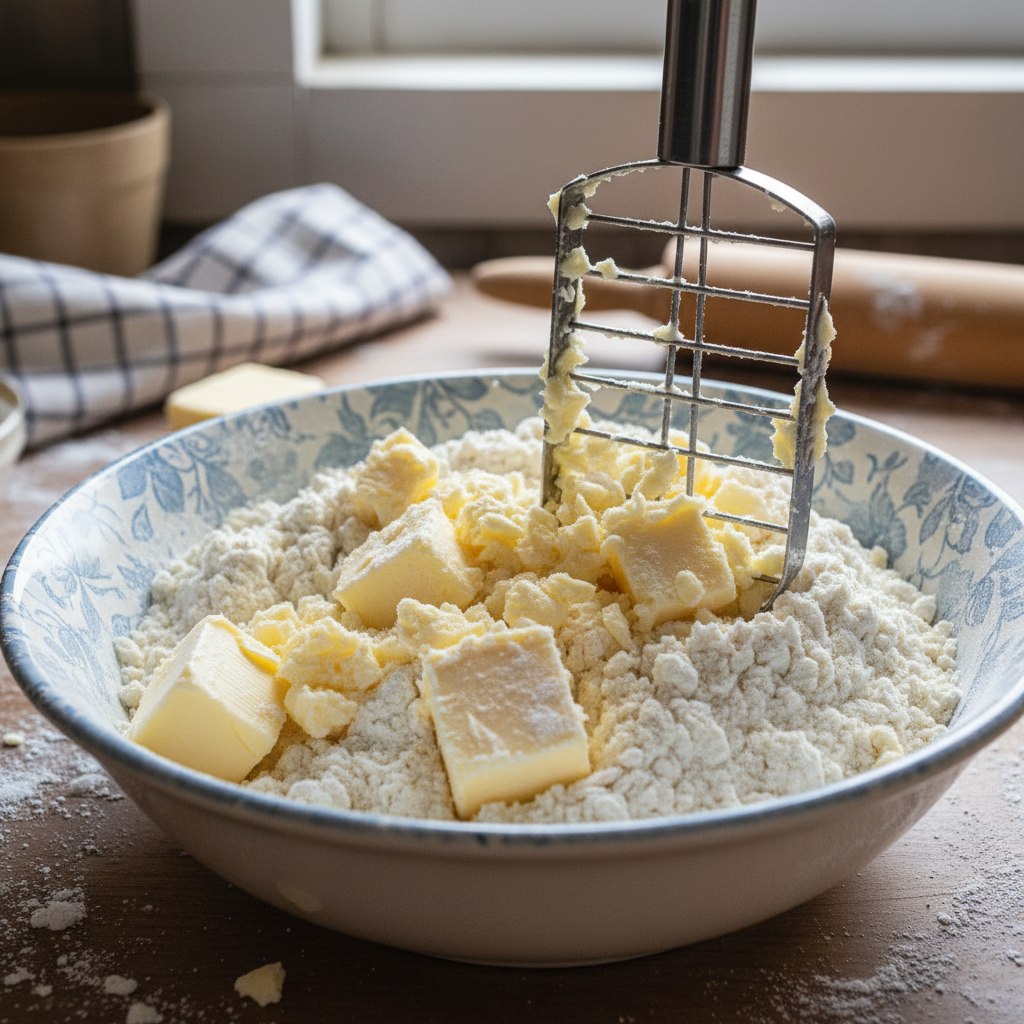
- Grab some ice cold butter.
- Chop the butter up into small pieces.
- Set this aside in your fridge while you get the rest of the ingredients together.
- In a smaller bowl, mix three quarters of a cup or 180 mils of heavy cream.
- Add one large egg.
- Add a tablespoon of a nice vanilla.
- Grab your whisk one more time and mix this up until it’s nice and smooth.
- Place this in the fridge as well.
- Chop dried apricots into smaller pieces.
- Give your pecans just a little bit of an extra chop because they’re kind of big pieces.
- Grab your cold butter.
- Pop that in.
- Work this butter into pea-sized pieces.
- Add your mixins if you’re using any.
- Give that a toss of everything’s nicely distributed.
- Grab your cream from the fridge.
- Mix this in.
- Just with your fork, scoop things along so it gets nice and hydrated.
- Press this together.
- Dump this out onto the surface.
- Gather this mess.
- Shape this into a disk and do some pressing.
- Shape into a seven inch disk.
- Use your bench scraper or a floured knife and divide this into eight equal wedges.
- Find the center of your circle and press through.
- Clean your cutting tool off in between cuts.
- Pop those onto your prepared baking sheet lined with parchment paper.
- This goes into the freezer for at least 15 minutes.
- After chilling, brush the scones on top with about a tablespoon of cream.
- Finish your scones off with a sprinkling of coarse sugar.
- Go into the oven 400 degrees for 10 to 12 minutes or until the tops are a beautiful golden brown.
- Let them cool in the pan.
- Drizzle with an optional icing.
Cooking Tips
You do not want to have a mouthful of salt or a baking powder.
You can even keep your butter in the freezer for like five or 10 minutes before this recipe, so it’s really hard.
You don’t want your butter to just melt and ooze out. That can give you a dry scone.
You want it to be really cold so that in the oven, it steams up and puffs up and makes everything amazing.
For this recipe, if you want like the best practice, I guess you would use your pea and style butter, it’s higher in butter fat and has less water.
I’m using regular American style butter today though.
I don’t want this to warm up. That would be not optimal.
If you’re not in the US, it’s called double cream, I believe, but you can correct me in the comments if that’s wrong.
One large egg, this could be cold.
A tablespoon of a nice vanilla. It makes all the difference.
It’s really fun to make your own vanilla because normal vanilla is made usually with like vodka or some kind of like the straight alcohol spirit.
When you make your own, you could use bourbon or dark rum or whatever else to add more flavors to it and then these vanilla beans.
You can just keep adding to them and adding to them with more and more. It’s like the gift that keeps on giving.
You can add about half a cup, a little bit more of any mix than you want.
Nothing can get warm. It has to stay cold.
If you wanted though, you could use dried or fresh blueberries. You could use dried cherries. Any kind of nut that you want.
If you wanted to use raisins for this, that’s fine. I would always soak mine and rum overnight if I’m going to use them. Otherwise, I don’t know. Not into it.
You could use a pastry cutter. You could use your hand. Use your hands or a fork to mash it in.
You don’t want your butter to be too small though. It’s important that you maintain those little lumps because that is the magic to tender, fluffy, moist, and amazing skin.
When it’s messy, you know it’s going to be the best.
You can freeze them as well and then bake them from frozen so you can have like an on-demand treat in the morning if you want it perfectly fresh.
Even if you made these a day or two before, you’re going to heat them up in the microwave, your toaster oven, your air fry, or your oven, and they are just like new. They’re going to be so good.
You could lightly forward or not. I don’t bother.
Don’t panic if this happens to you.
The pressing will make magic happen because you really just need to encourage all those dry bits to become part of the mess.
If your scone is tooth thin, it’s going to be dry. You need to have that interior volume so it really can be moist and fluffy inside.
Clean your cutting tool off in between cuts so it doesn’t start pulling things apart and you can spray a little flower if necessary too.
You can see these beautiful big splotches of butter throughout as well as all the mixins that you chose to add.
This, however, needs to freeze up for about 15 minutes, although if you want to prep this out a day ahead or several days ahead, however long you want, this can go into the freezer and you can bake them for frozen.
Brush the scones on top with about a tablespoon of cream. This will give them a nice finish and so they’ll be golden on top.
But they’ll also be glue to hold some more sugar on.
The scones themselves aren’t super sweet at all so it’s always nice for anything that is supposed to be a little sweet to have a sprinkling of sugar so the first bite has a bit of crunch and sweetness.
Just brush the top with cream, not the sides.
You could use granulated sugar if you don’t have any of the extra big crystals.
Serving Suggestions
Maybe drizzle with an optional icing and they’re ready to enjoy.
Oh my gosh, with the mix-ins, it’s just about perfection with a cup of coffee.
That tastes like a hug.
It’s golden perfectly sweet and the outside is crisp as can be but the inside is a buttery cloud of deliciousness.
I hope you get a chance to make this recipe and if you like this video check out my breakfast-free playlist.