It is go time. It is Christmas, which means you we are in the kitchen. We are baking up a storm. We are decorating, wrapping presents, whatever it is.
Why You’ll Love This
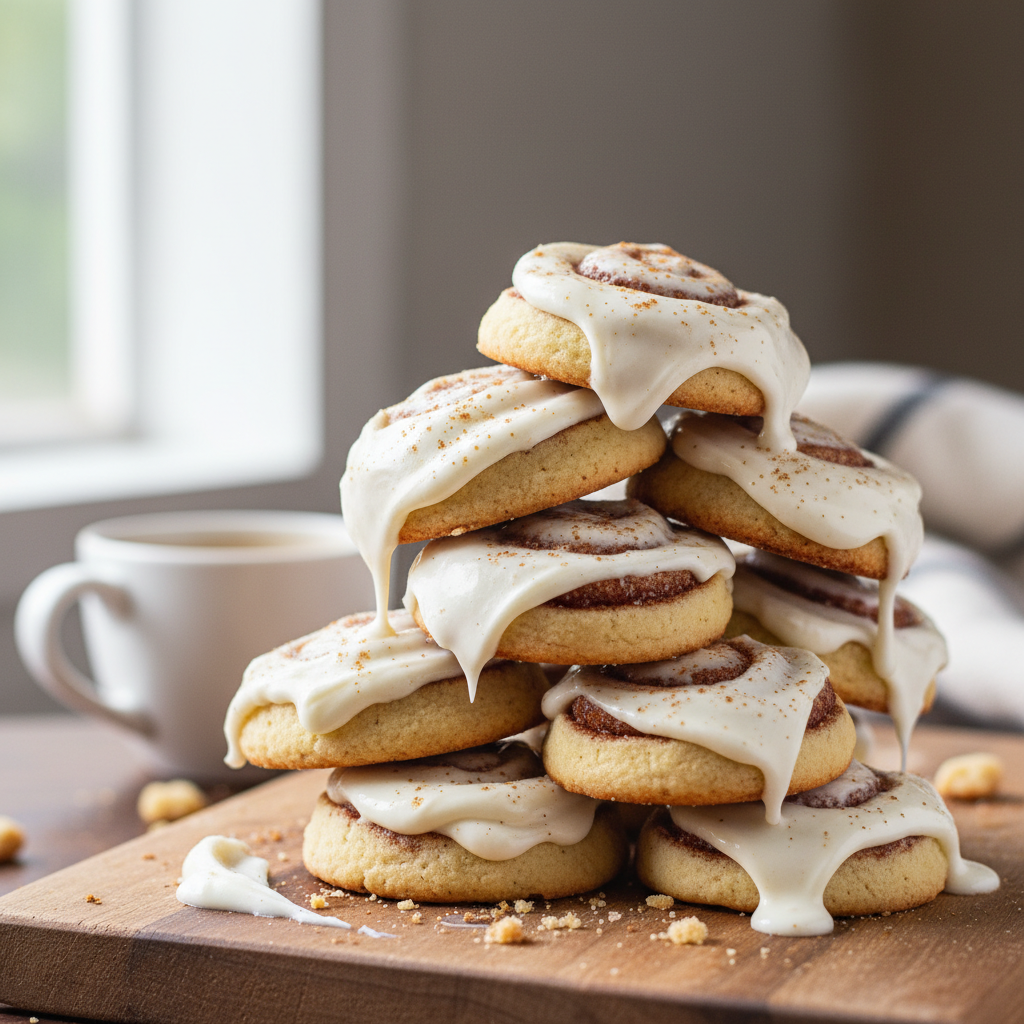
This is really fun because it’s a mini cinnamon roll. It is a cinnamon roll cookie, and I know that sounds kind of out there, but honestly, I think these are easier than regular cinnamon rolls. There’s not really a lot of work in to them. It’s kind of like a no-brainer. You let it sit in the fridge overnight and rise. So easy.

Ingredients
For the Dough
- some flour
- some sugar
- a little bit of salt
- butter
- instant, active, dry, yeast
- scaldened milk
- a little bit of water
- eggs
- a little bit of vanilla
For the Filling
- some brown sugar
- some cinnamon
For the Frosting
- butter (room temperature or just slightly soft)
- some vanilla
- some powdered sugar
- cream
Instructions
- Start by hooking on just a regular paddle attachment.
- Mix this up and also just cut the butter in like I’m making a pastry.
- You have it cut in little pieces.
- While the mixer is on, I just start throwing the pieces in.
- Let this mix in kind of get more crumbly like a pastry like if you’re making a pie.
- Turn it off and put the wet ingredients in.
- At this point, you put in some yeast.
- Mix that right into the dry ingredients.
- For the wet ingredients, I have some scaldened milk.
- I added a little bit of water to that.
- Then I’m just going to put in my eggs.
- I’m going to crack them right into there.
- I’m going to mix them up right in there too.
- Just to get that yolk broken up a little bit of that white broken up.
- I’m going to add a little bit of vanilla.
- I’m going to dump this right on top of my dry ingredients.
- Right before I do, I’m going to switch out my paddle with a dough hook.
- I’m going to dump all this right in.
- We’re going to start mixing it up.
- Let it go until it comes together in just a cohesive mass.
- While it’s working, you just may need to scrape down the sides.
- Work it in, get it down there so it can keep stirring together.
- Then just lift it back up.
- Let it keep going.
- Make sure I mix all of that flour in.
- We’re going to put it right in there.
- I’m going to get every little bit.
- We’re going to put all in there.
- I’m going to pop a lid on it.
- We’re going to wrap whatever you have.
- Put it in the fridge tomorrow.
- I’m going to weigh this just so it makes it easier for me to divide it into three on the scale.
- I’m going to work with one at a time.
- I’ll just cover that up.
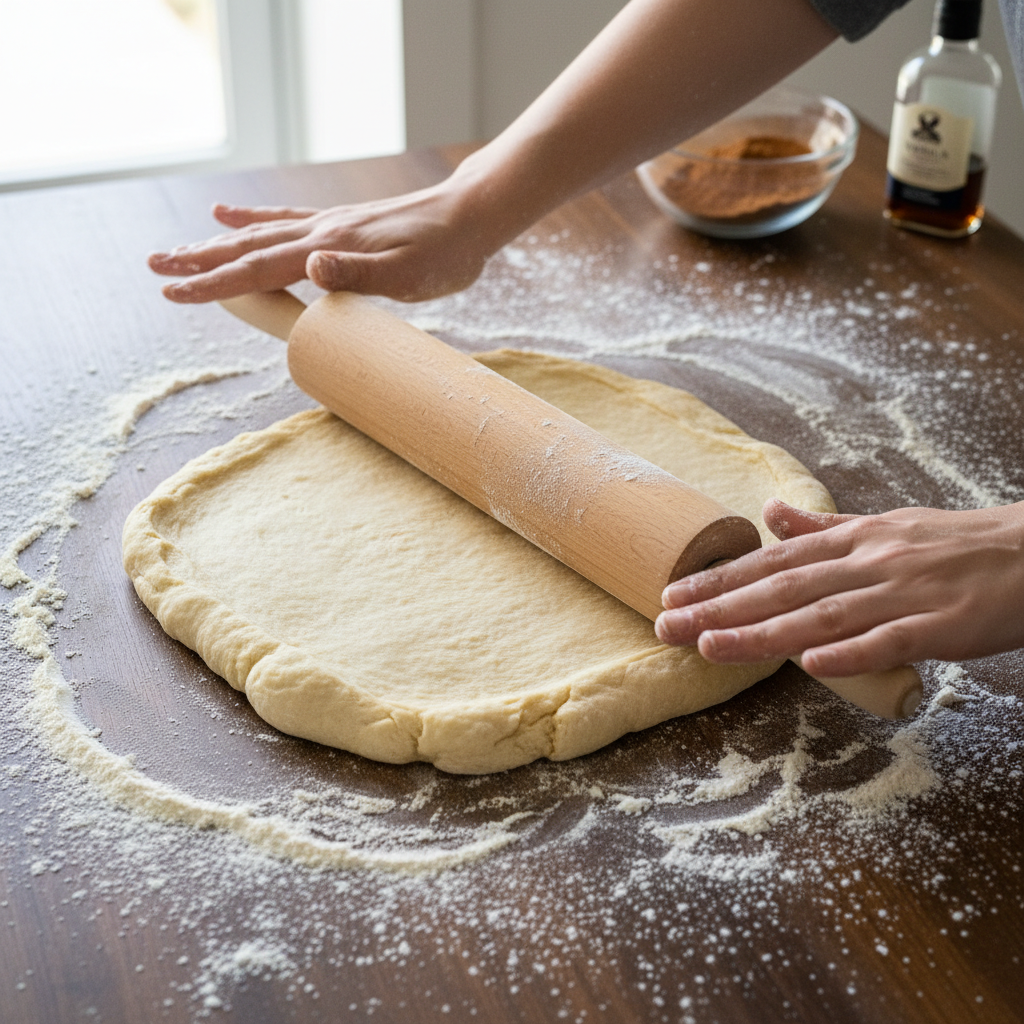
- Here, what I’m going to do is now roll it out.
- To do that, you definitely want a little bit of flour.
- I’m going to take my dough, put a little bit of flour around it.
- I’m going to smash it a little bit.
- I’m going to just start rolling out kind of like you would for cinnamon rolls.
- Just turn it if you need to.
- Every so often put some flour on your rolling pan.
- My roll is out into my rectangle.
- Here I have some brown sugar, some cinnamon.
- We’re going to spread it out onto our rolled out cookies.
- I’m going to start rolling them up just like you would a cinnamon roll or a jelly roll.
- Once you get started, you want to go tight at first just because you want that center to be nice and tight and not loose.
- We’re going to keep rolling.
- I kind of like to push it together like that.
- With that seam, I like to keep rolling it back until I see it.
- Then I’m going to go along.
- I want to cinch that seam pretty tightly and aggressively because I want that to really stick together.
- I will even put it down like that.
- Make sure it’s really well cinched.
- I’m going to get my knife and then we’re just going to cut it.
- I’m cutting and just filling up my pan.
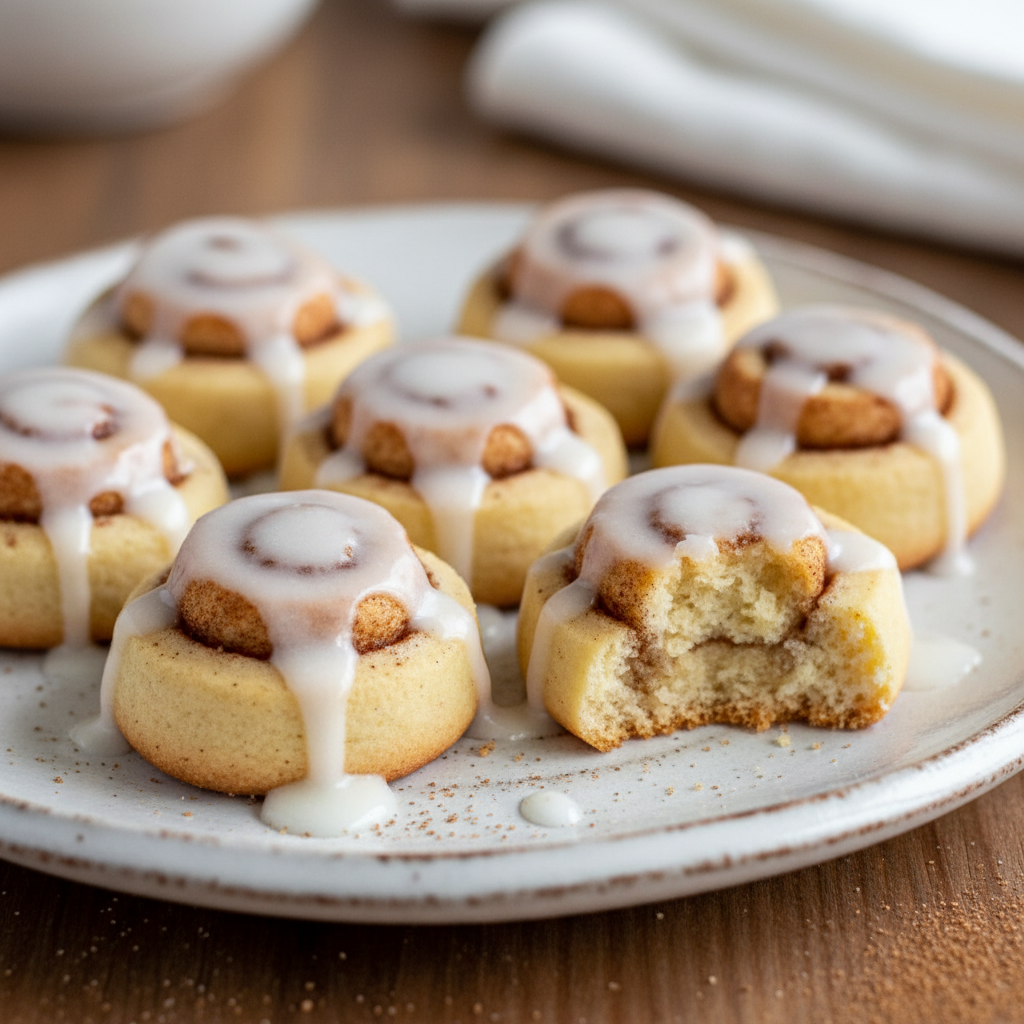
- You cut, as you can see, it’s like quarter to half inch size, little cookies.
- If you see as you’re cutting them that those ends are coming unstuck, just cinch together where that seam side is.
- Just cinch it with your fingers.
- I’m going to pop these into the oven.
- I’m going to keep cutting, rolling, baking.
- Let them cool, put them on a rack to cool a little bit more.
- We’re going to mix up a quick frosting.
- We’re going to put some butter in.
- I’m just going to add in some vanilla.
- We’re going to put in some powdered sugar.
- Put that in.
- I’m just going to mix this together, whisk it a little bit.
- If you want to thin it down, just add a little bit more of the cream.
- Work that in.
- If yours is too thin, just with a little bit more powdered sugar.
- To frost them, pretty simple.
- I’m going to take a cookie.
- I’m going to put some frosting on it.
- I just like to spread it around.
- I’m going to frost the rest of them.
Cooking Tips
I don’t usually sift my flour. Instead, I like to use a scoop and I scoop it in and overfill my measuring cup because as I’m doing this, it’s pretty much sifting the flour. So if you overfill, you just swipe it off and then you put it right in. So that really honestly creates pretty much an environment of sifted flour, and that’s just a lot easier, I think. Sifting flour in general, it can come from in like way longer before they were okay, flour back in the day. So I’m told or have read, really used to cake up and get lumpy. So that’s why a lot of old recipe calls for sifting. But if you can kind of do this and just, you know, get it lighter because if you just slam your cup in there and pack it in, you get way too much flour.
They can be stickier and harder to work with. So to make that easier, I put it into the fridge overnight. It rises in the fridge, but then that also makes it more smooth and elastic. So you don’t have to do the work. It just sits in the fridge and does it.
I use only instant, active, dry, yeast. I love instant yeast. It’s what I’m used to. It’s what I use all the time. If you are not used to it, you can use regular yeast the same way. You just have to bloom it in hot water. I don’t do that. Why? It’s like taking a step out, instant yeast. It’s wonderful. All of it. That’s all I think I use. So I’m mixing that right into the dry ingredients because that’s what you do with that kind of yeast. You can just mix it in with your dry, give it a whirl.
Just kind of, you know, you can put a whole egg in like a batter or a dough like this, but the honest thing is, it can be kind of hard to get them to break down. I think it can just be easier to just whisk them up a little bit beforehand. Just to get that yolk broken up a little bit of that white broken up. It’s nothing special.
If you’re doing this by hand, that’s fine too. I just, if you’re using a electric mixer, they can just be really handy.
While it’s working, you just may need to scrape down the sides, especially depending on what size mixture you have. That dry ingredients can kind of get caught up on the sides. So just work it in, get it down there so it can keep stirring together, and then just lift it back up. Let it keep going.
So you’re probably thinking, how is that going to come together? Well, what we’re going to do is slow it way down by putting it in the fridge. So that yeast is going to activate really slowly, but it’s also going to create this honestly a lot more workable dough. So bear with me, put all your trust in this, throw out everything you know about dough. Actually, there are other recipes like this. So some of you probably do know.
I’m going to weigh this just so it makes it easier for me to divide it into three on the scale. If you guys want to, don’t feel bad if you want to eyeball it. I just think that way it’s just a little easier to know if you have it divided. And then you kind of get even amounts when you’re doing it.
You can even put it back in the fridge if you wanted to. Whatever makes it easier for you.
You want it if you can into more of a rectangle as opposed to a circle, which is just like cinnamon rolls. You don’t usually want it to be a circle because when you roll them up, then they aren’t.
You know, it can help just too if you need to have a ruler, just so you can kind of make sure after you make them a few times, you’re going to be making these a lot. You’ll get used to it.
Now usually with a traditional cinnamon roll sticky bun, you would flatter butter in the middle. These have a lot of butter in the actual dough. So we don’t actually need to do that.
To divide this evenly, I do just kind of measure it out. Just so I know.
Once you get started, you want to go tight at first just because you want that center to be nice and tight and not loose.
I kind of like to push it together like that. And then with that seam, I like to keep rolling it back until I see it. There it is. And then I’m going to go along. And I want to cinch that seam. I’m pretty tightly and aggressively because I want that to really stick together. And don’t feel bad if you have to even it out a little bit. And I will even put it down like that. Make sure it’s really well cinched.
I like to cut it with a knife that has a slight seration. This is actually a cheese knife, which I don’t know if that really helps. It’s just what I have that has a good seration on it. And that to me just usually goes through pretty easily then that way.
If you see as you’re cutting them that those ends are coming unstuck, just cinch together where that seam side is. That way, as they bake hopefully, they won’t open up like this one wants to. Just cinch it with your fingers.
The center isn’t doughy. You can just take them out, let them cool, put them on a rack to cool a little bit more.
You kind of want it room temperature or just slightly soft, which you can see this when I can kind of smash with my spatula. So it’s softened and I want to do that just enough. So it’s going to make it a lot more workable and a lot more easier to incorporate with everything else.
This isn’t like a traditional just cinnamon roll frosting. I would say it’s, I would say it’s better and it has a little bit more, just it’s a little bit more luscious, maybe it doesn’t have the cream cheese, which to me, you’re either there’s two camps of frosting. It is cream cheese or not cream cheese. I never grew up with cream cheese frosting on my rolls, which you could do that with this if you wanted to, but this is better.
If you want to thin it down, just add a little bit more of the cream, work that in. And then if again, if yours is too thin, just with a little bit more powdered sugar, it’s like that secret that just kind of can smooth over anything.
When they had just a little bit of warmth, not hot because then it’s just going to melt off, but just a little bit of warmth. It kind of coats them better. I kind of wants to then fall into the cracks a little bit better. That’s what you want. You want those nooks and crannies to be just filled with this delicious frosting.
Serving Suggestions
It’s the perfect little treat.
So fun to me to have either on a cookie plate to give away at Christmas in a cookie box. Or even if you want to, and it’s like a brunch or a, you know, just kind of a breakfast type thing to have these as just a small thing that you can have with whatever you’re having. And so you don’t need a huge cinnamon roll.
Isn’t I think, especially with kids, how fun is this to have like a special little cookie treat?
Well, I mean, you can use these for so many times. And honestly, this is not just a Christmas recipe. I think you’re probably going to have this on repeat. Maybe weekly depends. I mean, because these are so good.
I love to keep them in the freezer. It just frees them one flat at a time. And then once they’re frozen, put a piece of parchment on top and do another flat and keep doing that. They store in the freezer for over a month if it’s in an airtight container. Give them as gifts around Christmas, around the holidays.
I love spending Christmas with you. So thank you for inviting me into your home so we can do this together. Let’s go make some cookies, some little cinnamon roll treats.